Quick Answer:
The Ledger Nano S is a popular hardware wallet that offers high security for storing cryptocurrencies. It’s designed to be tamper-proof and protects your private keys by not exposing them to potentially compromised computers.
When you receive your Ledger Nano S, ensure it hasn’t been tampered with and that all contents are present including the device, recovery sheet, and other accessories. To set it up, connect the device to your computer, create a PIN, and write down the 24-word recovery phrase that is displayed on the device.
Next, install the Ledger Live app on your computer or phone to manage your account and install apps for the cryptocurrencies you wish to store. The Ledger Nano S supports over 23 coins and 1250+ ERC-20 tokens.
For Bitcoin, choose between a Legacy or a Segwit address, with Segwit recommended for its benefits. Periodically update your wallet’s firmware from the Ledger Live Manager to access new features and security enhancements.
If you lose your wallet or it’s stolen, your funds are safe on the blockchain and can be recovered with your 24-word phrase. The Ledger Nano S is cost-effective, user-friendly, and offers a secure way to store cryptocurrencies, with a price of about $59.
In the world of cryptocurrencies, there’s no such thing as over-the-top security levels. Anyone who’s already involved in crypto trading or is tempted to join the train must be well aware of the challenge to keep your cryptos safe from greedy hands.
Luckily, today’s technology has not only evolved enough to make exchanging digital coins possible but to protect them from these malicious attacks as well. More and more traders are placing their trust in the so-called hardware wallets whose sole purpose is to store and safeguard their funds.
Before, traders usually kept their cryptos in a digital wallet accessed from their computers with a private key. This proved too risky as a computer can be easily compromised or affected by malware. With hardware wallets, you don’t have to worry that someone will gain access to your private key and steal your funds in a flash since they don’t expose the key to another device.
The Ledger Nano S is a favorite hardware wallet among crypto traders, mainly because of its ease of use and top-notch security. If you’re interested in getting one yourself and want to know how to set it up and use it, our guide will give you all the answers.
Getting Started With Ledger Nano S
Check Whether Device Is Genuine
When it comes to devices like Ledger Nano S, purchasing the ledger directly from the official Ledger online store is by far the most reliable option. This way, you’ll be sure to receive an authentic product with full hardware and software security.
Once the product box arrives, here are some additional security checks that you can perform to test its authenticity:
- Check that the box hasn’t been tampered with physically – Before opening the box, make sure it arrived completely sealed. If you notice someone has been messing with the package, return the product immediately.
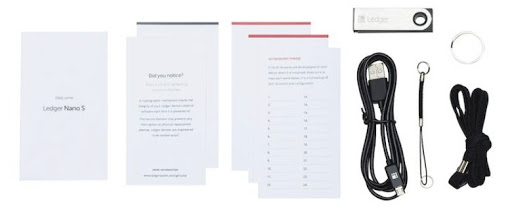
- Check all the box contents are there – When unboxing your Ledger Nano S box, check whether it came with the following:
- The Ledger Nano S device;
- A ‘Did You Notice?’ paper card which informs you about the product’s protection:
There’s no anti-tampering sticker on this box. A cryptographic mechanism checks the integrity of your Ledger device’s internal software each time it is powered on. The Secure Element chip prevents any interception or physical replacement attempt. Ledger devices are engineered to be tamper-proof.
- A ‘Getting Started’ paper card which serves as a manual;
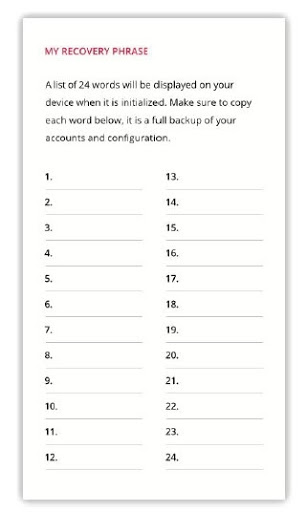
- Recovery sheet which must always come blank! You might get three copies, just in case, although you only need to fill out one (we’ll talk about the recovery sheet in more detail in a moment);
- USB Connection Cable;
- Additional accessories like a keychain and a lanyard;
- Additional packagings such as unmarked foam or cardboard.
The contents of the Ledger Nano S box.
The Setup
Your Ledger box is in perfect condition and the inside contents are all there? Perfect.
Now continue with the setup process using the simple steps explained below. It should take you no longer than 20-30 minutes to complete the configuration.

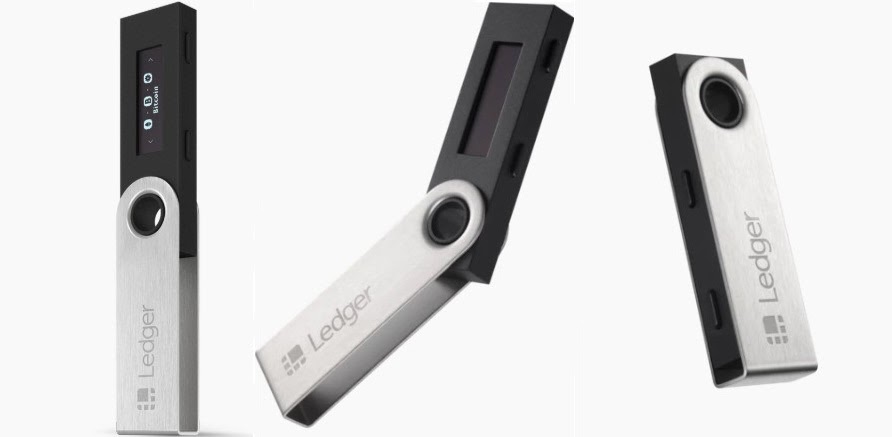
- Take the Ledger Nano S in your hands and have a good look at it. Its shape is exactly like a flash drive and has a black body, swivel cover, two top buttons, and a small LCD display. (You have the option to choose from five different colors for the body, including transparent. Cool, right?).
- Take the USB cable out and insert the small end into your device. Plug-in the other end into your computer to connect the two devices. Your computer should have Windows 7+, macOS 10.8+ or Linux, a USB port, Google Chrome / Chromium installed, and a strong internet connection.
- A welcome screen will appear on your Ledger Nano S, followed by a “Press both buttons to begin” command at which point you should press the two top buttons at once to begin the configuration process.
- Next, the device will ask you whether you want to configure it as a new device. This time you press the right button located above the tick on the screen.
- You will be asked to choose a PIN code. If the PIN code is already given to you or the device doesn’t ask of you to create a new one yourself, then someone might have compromised the wallet. Otherwise, you should come up with an 8 digit code and select the numbers by clicking on the buttons. You’ll have to provide the PIN code every time you need to unlock your device.
- For the next step, you need to get your blank Recovery sheet. It’s time to discover and save your 24-word recovery phrase. It will be displayed on your Ledger Nano S screen word by word, while you write them down on your Recovery sheet in the order in which they appear on the screen. They will be shown to you only once, so be careful to write them down correctly before moving on to the next word with a click on the right button. Repeat this process until you have reached the twenty-fourth word (Word #24).
- Then you will be asked to confirm your recovery phrase. Select the words by navigating with the top buttons. A very useful tip: keep your Recovery sheet somewhere safe because if anyone gains access to it, your funds could be stolen.
And voila! Congratulations, you’ve completed the setup process. Nothing too complicated, right?
How to Install the Ledger Nano Apps
Okay, the more tiresome part is over but there are still a few steps left before you’re ready to put your Ledger Nano S into action. You need to install its companion software, the Ledger Live, either on your computer or on your phone. The app can be found for download on the official Ledger website.
Ledger Live allows you to check and keep track of your real-time balance whenever you want and manage your account with ease. It’s the foundation without which you can’t install any apps on your Ledger Nano S.
When you open the app, click on “Initialize a new Ledger device” and then choose your Ledger device (Nano S in our case). This is followed by a couple of screens that remind you that you’re supposed to set up a PIN code and record the recovery phrase.
The final step is to set a Ledger Live password before you finally move on to installing apps to your device directly.
How to Use the Ledger Live Manager
After you’ve successfully installed the Ledger Live, you’ll open the app and go to the Ledger Live Manager for the app catalog. You only need to install the apps of those cryptocurrencies you want to store in your hardware wallet.
For example, if your plan is to store bitcoins, you should install Bitcoin and immediately see the app icon on your device screen. The Manager on your desktop will have a search button included for quick access to the wallet in question.
Ledger Nano S lets you send and receive a wide variety of cryptocurrencies, with up to 23 coins and over 1250 ERC-20 tokens on offer. ERC-20 tokens are basically coins that don’t have their own blockchain but reside on top of the Ethereum blockchain. The fact that it receives support from so many cryptos is another proof of how trustworthy this hardware wallet is.
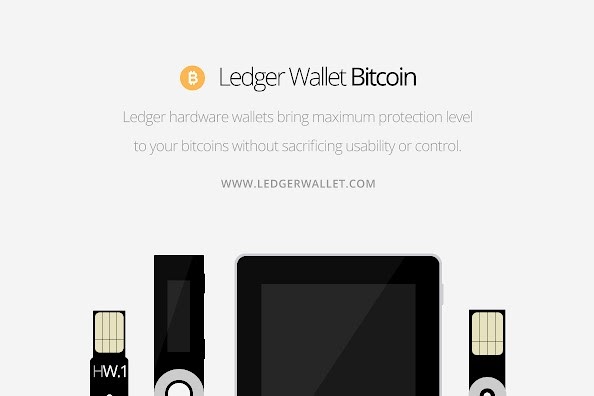
The Ledger Wallet Bitcoin
Okay, let’s go back to the Bitcoin Wallet app. The first time you run it, you will be asked to provide your PIN code before you create a Bitcoin address. Then you get to choose between a Legacy or a Segwit address.
Not sure what the difference is? Legacy is an address that starts with the digit “1”, while Segwit uses different formats.
It’s recommended to opt for a Segwit address as it comes with some advantages like reduced transaction fees, signature time optimization, and future scaling optimization among others.
The Bitcoin app is very user-friendly and free from clutter, which means you won’t have trouble finding the Send and Receive Transaction commands and other settings. The wallets for other cryptocurrencies are organized in a very similar manner.
How to Update Your Wallet’s Firmware
Ledger releases an updated version of the wallets’ firmware periodically as a way of introducing new features and enhancing their security. That’s why, from time to time, it’s advisable to check for announcements of new updates on the official Ledger website.
The current firmware version of Ledger Nano S is 1.6.0. To update your wallet do the following:
- Connect your wallet with your computer and open the Ledger Live Manager.
- Check which firmware version you currently have. If you have 1.4.2 or 1.3.1 then you’ll have to uninstall all the apps manually. If you have 1.5.5 then you just click on the blue “Firmware update” button and the apps will be uninstalled automatically.
- Carefully follow all the instructions. You might be asked to provide the recovery phrase so keep it close at hand.

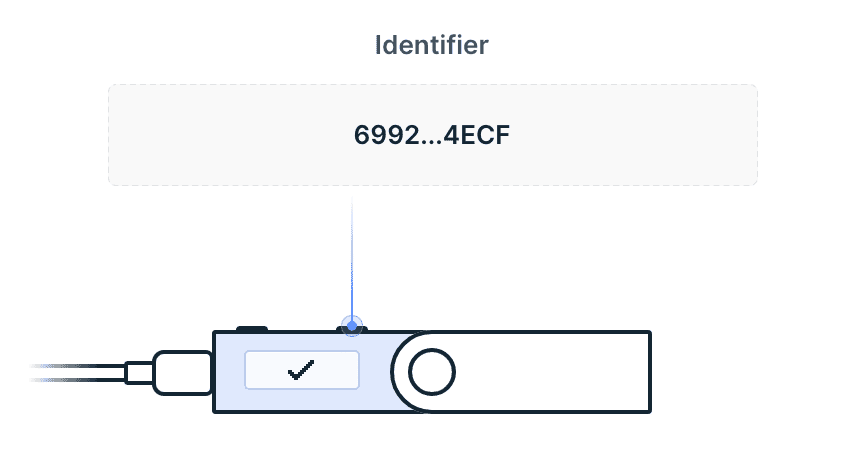
- To begin the update on your device, wait for the Identifier to show up on the screen and then verify that it matches the one shown on the Live Manager. Press the right button on the wallet to start, enter the PIN code, and wait as your device restarts itself.
- Disconnect your device from your computer. The update process will continue automatically. You’re done once you see “Firmware updated” displayed on the wallet’s screen.
What if You Lose Access to Your Wallet?
What if you somehow lose your hardware wallet or someone steals it from you? Are you going to lose your funds forever? Of course not!
The first thing to remember is that, technically speaking, your digital coins aren’t stored inside that piece of hardware. They’re stored on the blockchain, which is then accessed through your Ledger wallet.
Therefore, if you have chosen a secure PIN code and have correctly written done your 24-word recovery phrase on your recovery sheet, you can just purchase a new Ledger Nano S and input that same recovery phrase to regain access to your funds. There’s no way that someone could have broken into your account.

Final Words
The Ledger Nano S is an incredibly cost-effective device judging by all parameters. Compared to its main rival Trezor, another hardware wallet on the market, Ledger Nano S is not only supported by an impressive number of digital coins but it also charges its users lower transaction fees.
The product itself isn’t expensive either, it costs about $59 and ships free to almost every state in the US. In case that still seems like a big investment for some of you at the moment, remember that it’s definitely a great value for money in the long run. Some other online wallets might seem more tempting to you at first, but imagine what you could lose if someone hacks the online wallet by stealing your private key. Your funds will be gone forever!
To avoid unnecessary headaches, transfer your funds to Ledger Nano S and these worries will become bygones. This hardware wallet bridges the gap between the online blockchain network and the physical world. The sophisticated security measures, verification processes, and ingenuity of the recovery phrase and backup process are enough to discourage even the most persistent hackers.
The Ledger company is known for making hardware wallets and apps that feature a minimalistic and easily-navigable design. By following our simplified steps and useful tips you’ll tackle its small learning curve in no time.

